Shrunken Apple Heads
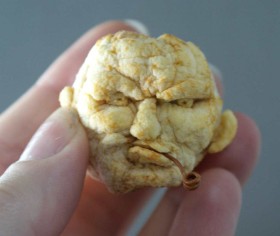 Ready for a good ol’ fashioned craft? Making shrunken apple head dolls is a cheap and easy activity to get everyone laughing! You just need a little patience while they shrink, but it is so worth the wait!
 When we go grocery shopping, Em’s eyes get wide in the produce department and she starts loading up the cart with all kinds of fruit. I get excited that she’s excited. (Most of the moms I talk to have very picky eaters!) But somehow once that fruit gets home, it gets forgotten. I try to push it for lunches and snacks, but we never seem to eat it all while it’s still fresh. Lots of the odds and ends end up in my lunchtime smoothie. I have some crazy concoctions sometimes… But when we recently had a poor forgotten apple that was starting to shrivel but miraculously wasn’t bruised, I knew what I was going to do with that apple. Shrink it!
I remember making a shrunken apple head granny doll as a kid. She had cotton ball hair and a cute calico dress and I even made wire glasses for her. I don’t remember what happened to her, but she was kind cute in a wrinkly sort of way. Then a couple of years ago I made another one so Em could see how the apple shrinks as it dries out, just like a grape into a raisin. We added googly eyes to “him” (it didn’t really look very feminine), which we thought was hysterical. It’s been sitting on a shelf in my kitchen all this time. It actually looks more creepy now because at some point during our playing with him one of the googly eyes got stuck. So now I feel like he’s a creepy old man staring at me while I cook.
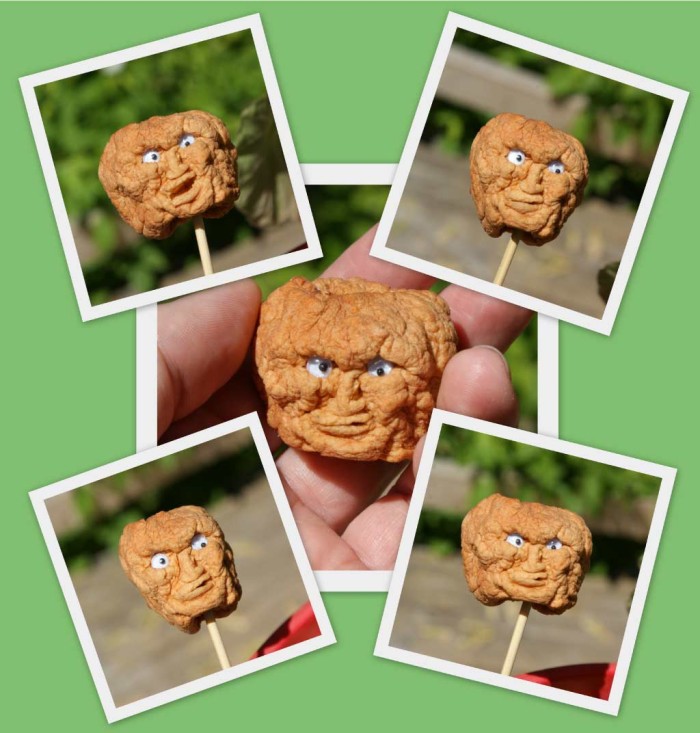
The “shrinking process” is really just dehydrating, just as if you were making dried apple slices or drying apricots. The end result isn’t crunchy, but leathery. This also means you can kind of squish it around when done to make different faces, like I did above. You have to be gentle with parts like the nose, but other than that, you can have fun molding different expressions.
Apple prep
To make one of these, you can use any size and variety of apple. It’s actually better to use a fresh one than an aged one, because it will be easier to carve. When it has already started the drying process, it can be a bit squishy instead of firm, which is harder to cut. Also, you will not be able to carve where there is a bruise (brown spot), because it is too soft and fragile. If your apple has bruises, see if you can put them to the back, or maybe a spot is small and would be carved out, like in the eye area.
Peel your apple, but hold off coring it, at least not completely. Some people core it (mostly so it will dry out faster), but it makes the apple more fragile while you are carving. Some like to leave the stem on for hanging it, so that’s optional. My apple was missing the stem already, so I didn’t touch the top side, and on the bottom, I just cut a little bit toward the core. At this point I started carving. Some suggest first soaking it in a lemon juice and salt mixture for several hours to overnight to keep the flesh from browning. Some apples brown quicker than others. I used a variety that doesn’t brown too fast, so I carved it first. If you do soak it, make sure to thoroughly dry it off before starting to carve. And I really don’t think it has to soak that long.
Carving tips
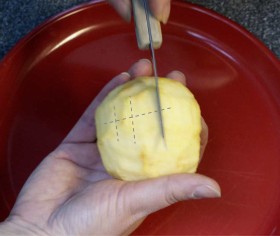
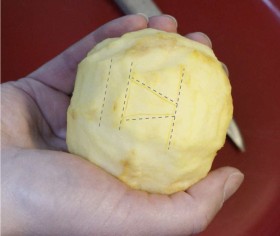
I start the carving process by lightly scoring some lines on the side that will be the face. If you’ve ever done sculpting or taken a drawing class, you’ll be familiar with the rule of halves for facial proportions. (A good tutorial can be found here.) Basically, the eye sockets are about halfway down, then divide the bottom half again to find the tip of the nose, then divide that bottom section again to find the bottom of the lips. It doesn’t have to be exact. So I make 3 light scores at those places. Then I make light diagonal score marks for the nose between the top 2 lines. You can make the nose skinny or fat, it’s your choice. Just remember that all features need to be exaggerated so when it shrinks you’ll still be able to see them! It was very hard to see the lines in my photos, so I added the gray dotted lines so you could see them better. You could also draw a rough sketch on the apple with a marker.
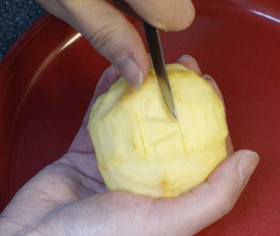
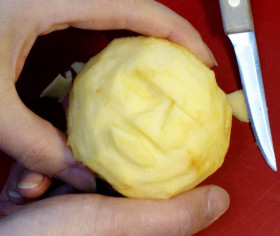
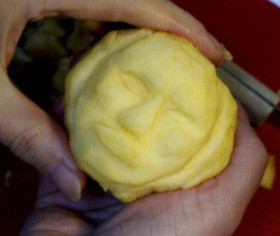
I try to rough out the whole face and then gradually refine each area. I usually start by defining the eye sockets. Imagine a circle, larger than your eye, that goes from the brow to the bridge of the nose, to the top of the cheekbone, and over to your temple. Again, you can draw it first if you want. Take little bits at a time, since you can always cut away more, but can’t put it back! You can start defining a little bit of the nose and cheek at this point too. Remember, with clay you can add more clay to build up an area, but here we can only take away. So keep in mind the “high” points like the tip of the nose, the cheeks, and the brow.
On to the mouth. I define the shape of the lips by taking away around them. Normally when you sculpt you’d also take away some depth for the lips themselves, since your lips don’t stick out as much as your nose. But we’re going for the Mick Jagger look here, because you’ll have more flexibility to give him or her expressions once shrunk. At this point, don’t do any detail on the lips themselves, but you can start defining the chin and work more on the cheeks.
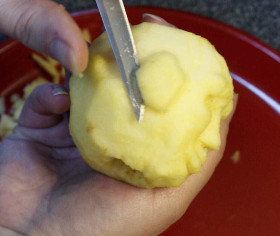
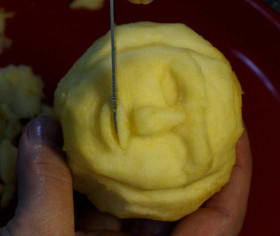
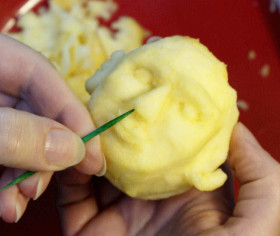
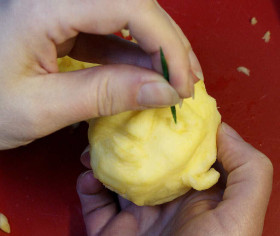
In the past I’d always left the head the same shape as the apple, but this time I decided to make it a bit narrower, so I defined a more oval shape for the head. (In hindsight, I probably should have done this first.) I also decided to attempt ears for the first time. So, once I got the oval shape defined on the front, I knew how much to take away on the sides, but not in the ear area. Block out the ear, then refine it. Remember to put a slight cut behind the ear, so when it’s dry you can make it stick out Prince Charles style if you want. Since my apple was a bit squishy, I had trouble on the delicate ear and one of them partly broke off. So my guy is going for the van Gogh look. I saved the piece and I might try to glue it back on if it still fits after drying.
Back to the lips. Once you refine the shape of the lips, carefully cut a slit between them. Get the shape first, then cut it very deep. This will allow you to open its mouth when dried. Don’t try to open the lips up now though, just put the slit there and maybe just wiggle the knife a little bit so air can get in.
Now refine the eyes. I lightly scored the iris. This is optional if you want to give it googly eyes or use pins or beads or even paint them once dried.
My final step was to use a toothpick to define the nostrils and the pupils of the eyes. You can see the final carving here. Notice that I just had a little bit of browning, which is amazing since it took me three times longer than normal from taking all the photos along the way. I think he’s pretty handsome, don’t you?
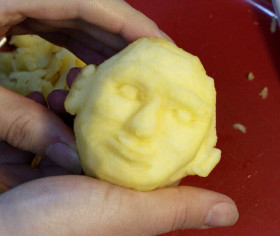
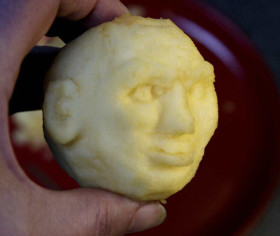
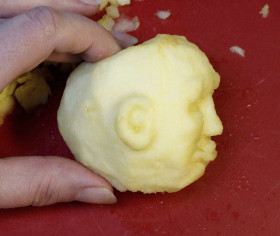
Tee hee… I started working on this post Monday after getting only 2 hours of sleep because I stayed up until 4:30am watching Rocky Horror Picture show and then some movie with Helen Hunt and Scarlett Johannson. When looking through some of these photos, I started to think it looked like Scarlett Johannson. I think it’s the high cheekbones and the lips… and lack of sleep! I’ll let you be the judge…
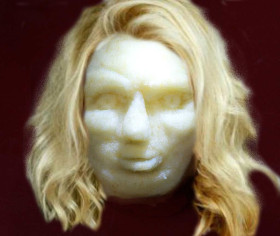

Ok, I’m officially creeped out by that!
One more step…
The hard part is done! Now you’ll want to soak the head to prevent browning. Do this step now even if you soaked it before carving because you’ve exposed fresh parts that aren’t treated. As I mentioned before, some say to soak in straight lemon juice, and some add salt, with the idea that the brine will draw out moisture and make it shrink faster (really? I’m not buying it). I, on the other hand, used Fruit Fresh. You can also crush up a vitamin C tablet, or use lime or pineapple juice. If you use lemon juice, I’d find a drinking glass just big enough for your apple head, add maybe a tablespoon of juice, and then top off with enough water to cover. Now, again, some say to soak for a long time. Me? I soaked it for like 5 minutes, maybe. I guess it depends how much you care if it gets brown when dried. You can see in the one we did a couple of years ago, it definitely has browned over time. I don’t think I gave that one any treatment before drying.
Regardless of what you soak it in or how long, when done, dry it off with a towel. If your apple still has the stem, you could try to hang it up somewhere by that. Or you could insert a wire thru the core to hang it. Another option is to put the head on a skewer (like a jalapeno on a stick… any Jeff Dunham fans out there?) and stick the stick in a potted plant or something. Or just let it sit on a plate or towel. But if air isn’t getting all around it, make sure to move it around every day or two so it dries out evenly and doesn’t begin to mold. Since I needed an out of the way place with a decent background and decent lighting for it to sit for the duration so I could photograph it, l had it on an upside down tiny hors d’oeuvres bowl. I went a few too many days without moving it and it got a little fuzzy on the bottom, but I wiped it off with a Q-tip and alcohol.
Let it dry
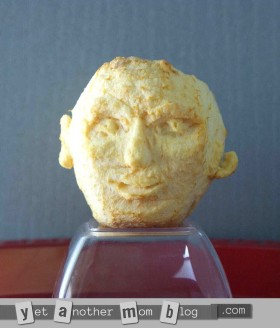
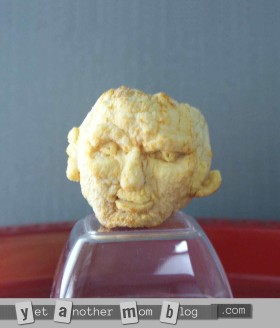
Depending on the humidity and the water content of the apple, it could take two or three weeks to shrink to its final size. You’ll know it’s done when it is leathery and isn’t shrinking any more. You can speed up the process with a dehydrator (I didn’t think to use mine until after it was done. Doh). I’ve heard that you can use a very low oven too (just as when drying fruit to eat), but I never tried that.
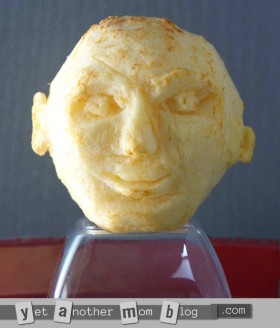
Day 1
Day 3
Day 7
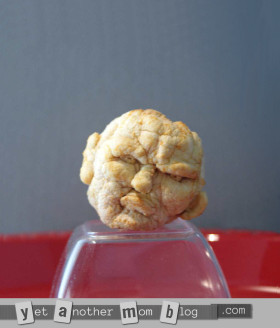
Day 18
Let’s see how it turns out!
Once dried, you can tweak it (gently)! Every one is different and not really predictable, so you might need to play with it a bit to get the right shape of the head and nose, tweak the ears, and decide on the position for the lips. If you want to add eyes, now is the time for that, or even painting it with food coloring (for lips or color in eyes), or watercolors or acrylics… , and maybe add some hair or a hat. Whatever you want for the final look.
I love “Grumpy Gus” in the upper right! It’s a bit hard to tell from the small picture, but his lower lip is up over his upper lip.
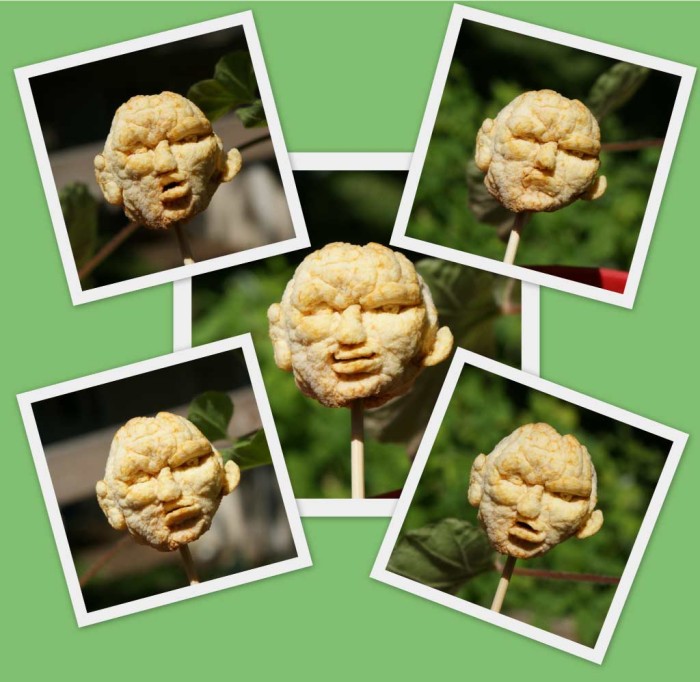
I’ve just left these two heads without bodies, but you can make a full doll body to go with it. If you make a soft-bodied doll, insert a wooden dowel into the torso for a spine (or a skewer, or strong wire, or even a Q-tip), and leave enough exposed at the top for a neck and to go into the apple head core.
Have you ever tried this? How’d it come out? Do you have any other tips to share?


Such great memories of making these growing up! I just linked back to this page from my post at growwildmychild.com Thanks for the inspiration!
Thanks! There are a bunch of “old fashioned” crafts/activities that have kind of been forgotten. I’d like to see them come back! And the advantage of most of those are that they are cheap/free and often educational.
So true! Several of your posts here have been triggering childhood memories (shrink plastic and dragonflies!?). I look forward to seeing what you will post next!
Going to do this with my grandchildren this weekend. So cute they will love it. I thought the side view of yours looked like Trump.
This is so cute! I just found your site. I live in Germany and have worked in a kindergarten before I retired. Every year I am a witch at Halloween and have fun with the kids who come to my door. You can be sure, this time I will try the shrunken apple heads. Thanks for this nice recipe.
Sorry if there are any mistakes in grammar but English isn’t my mother tongue.