Our Generation/American Girl undies/bikini bottoms pattern freebie simple sewing... and upcycle your underwear!
My daughter loves playing with her “big dolls” (the 18″ Our Generation dolls from Target which are a knock-off of American Girl dolls). We’ve gotten some clothes for them at yard sales, and she’s gotten new ones for birthdays and Christmas. But we never found any underwear! The only kind we’ve seen are those big baggy bloomer style. Those are fine if you are dressing the doll in a period costume dress, but not for today’s fashions. You can’t wear leggings over those!
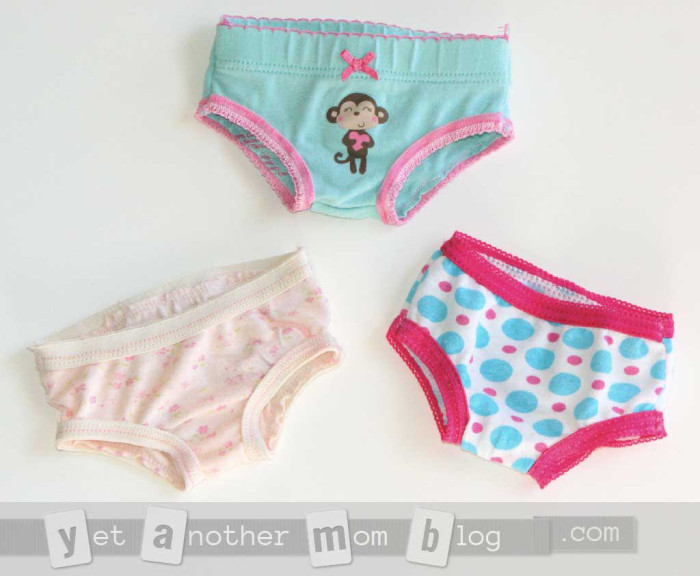 She had some of her own undies in her unmentionables drawer that haven’t really fit her for a while now but she refused to get rid of them because she liked them too much. This is an ongoing problem we have with all of her clothes… well, pretty much anything. She inherited the saver gene from me. Anyway, I suggested we make some doll clothes using her old clothes! That way, she still has the favorite embroidered animal or print she loves, and now there is more room in her drawers for new ones.

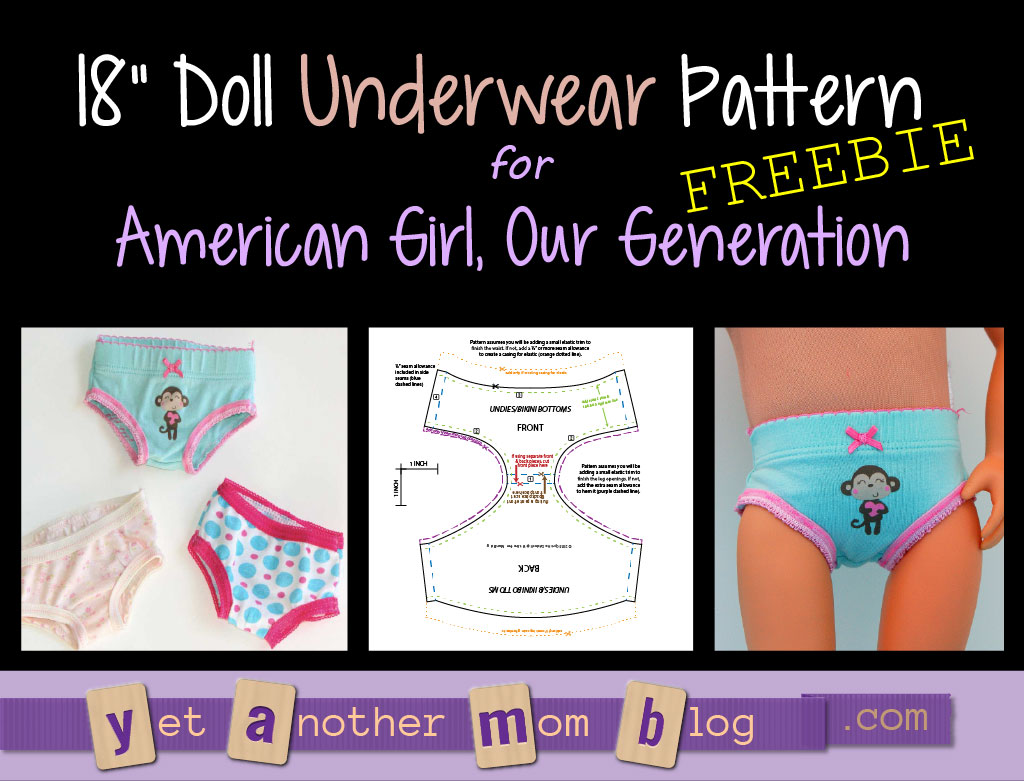

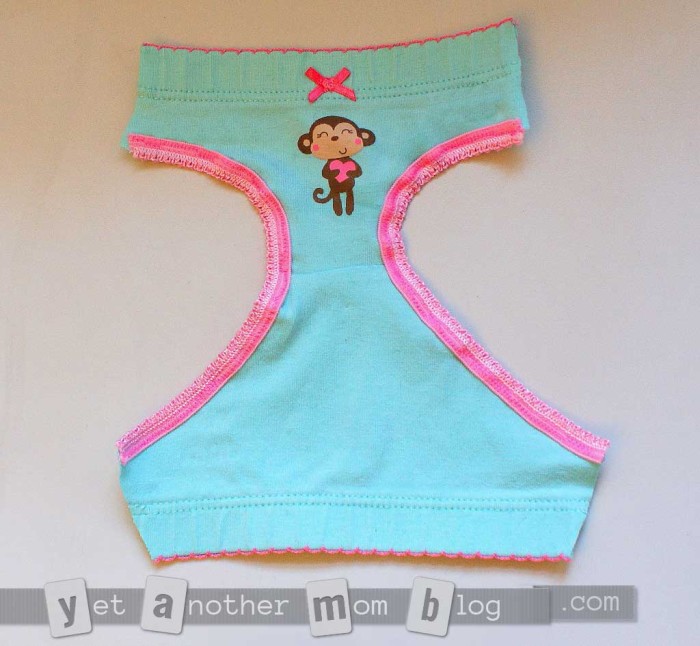
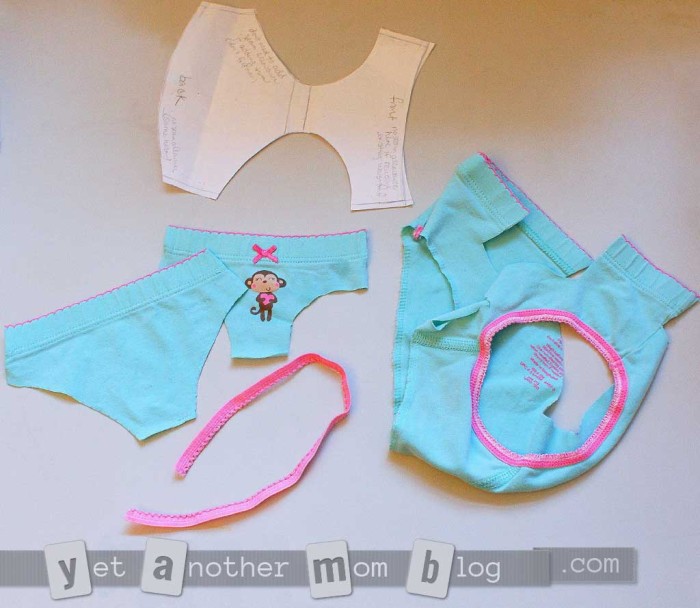
She picked out this pair with the cute monkey. In order to preserve the monkey, we had to be creative cutting out the pattern. Since the monkey was pretty close to the waistband, and there was also a cute little bow on the waistband, (and, well, let’s face it, I’m lazy), I decided to keep the existing waistband. It always looks better if you can keep a factory finished edge. And it saves you a step!
I got out my seam ripper and painstakingly removed the trim around one of the leg openings to reuse on the doll’s pair. If you have a scrap of trim lying around, use that, or you can just hem the openings. Or, if you think you have enough fabric scraps and patience, you can make your own binding. [Exercise left to the reader.]
I created a pattern, which you can find for PDF download here. I don’t use patterns for lots of the 18″ doll clothes I make, because it is so easy to just pin the fabric to the soft body of the doll and get a customized fit each time. But since I’ll probably be making a lot of these for undies and bikinis, I figured a pattern would be quicker. If you look at the pattern, I created it with a slight dip in the front and rise in the back. Lots of patterns I’ve tried for AG/OG dolls are too short-waisted and then if you try to sit them down, they get a bad case of plumber’s crack. Not attractive. If you are trying to use an existing waistband like I was here, then you really have to have a straighter waistline. Just make sure to line up the top edge of the pre-fab waistband at the intersection with the stitching line (1/4″ in from the ends) instead of the outer top corners of the pattern.
Note: this post may contain affiliate links to products I use and/or would recommend. This post is not sponsored, nor have I received any other form of compensation from these companies. All opinions are my own. I have included links so that you can easily find the products I am referring to, and, if you decide to purchase something through one of these links, I receive a small compensation for sending you to them, but it does not cost you a penny more. I use these meager earnings to help support my blog. You can read my full disclosure here.
Tips for working with knits and small pattern pieces
[Readers: This post is pretty long, so I’ll probably move most of this tips section to a whole separate post later, so if you come back and see this section missing, don’t panic – I’ll include a link to the separate post.]
Before we get into the instructions, let’s discuss fabric. This pattern assumes you are using a stretch knit fabric. Unless you wear granny undies or your boyfriend’s boxers, your undies are cut smaller than your regular pants and stretch to get a nice, smooth fit. You want the same for your doll!. So this pattern couldn’t be used as a base for shorts or pants, unless they were just for knits too, like biker shorts or leggings.
Stabilizing the fabric
Now, knits aren’t the easiest fabric to work with, especially in small sizes. If you have trouble with the fabric getting caught in the throat plate of your sewing machine, there are some tricks I’ve used that I’ll share. You could use a water soluble stabilizer or a light-weight tear-away stabilizer
on the bottom (and even top) of the fabric to help keep things moving smoothly and keep it from stretching and distorting. You can also use just tissue paper, but it is harder to get the little bits out from under the stitches. Another thing I use are used dryer sheets (like Bounce). After they’ve been through the dryer I save the sheets. I don’t know about other brands, but the Bounce sheets are very lightweight. They stretch in one direction but not the other, so think about this if using them. If you are trying to stabilize a seam and want to even be able to pull on the sheet to help feed the fabric through the machine, make sure you lay it out correctly. After stitching you can cut away most of it and leave the rest, or pull it carefully and it almost shreds to remove it. (That’s my other upcycling tip for the day.)
Speaking of stabilizers, I just discovered Sulky has sticky-backed tear-away stabilizer sheets that you can put through the printer! You could print your pattern right onto the stabilizer and stick it to your fabric. How cool is this! This would make cutting pattern pieces out easier too. I can’t wait to try it! If you’ve tried it already, leave a comment and let us know how well it works.
Aligning the seams
Another product I’ve found invaluable when working with doll clothes is Dritz Washaway Wonder Tape. This is 1/4″ wide double-sided tape that can hold the seams together instead of trying to use pins. You can sew through it and it washes out. I don’t know if they make a narrower version, but I usually cut a piece off the roll, then cut lengthwise down the middle so I have two narrower strips which I then cut little pieces to tack down areas. This is needed for the narrower seam allowances on doll clothes. Depending on what I am sewing, I may just use a little piece at the beginning and end of the seam to make sure they stay lined up perfectly, or I may go the whole length of the seam, especially when working on curves, such as on a sleeve cap. Another option is to use a fusable hem tape
). I do this once in a while, but I hate dragging out my iron and board (I don’t have a lot of room in my sewing area), plus a full-sized iron is usually too big for working with tiny seams. I always burn my fingers. I bought a Clover Mini Iron
which has different size heads you can attach for doing tiny seams. It’s the perfect size for those tiny areas, but you have to keep a watch on the temperature because it doesn’t have the same control of a full size iron.
Picking the right stitch, needle, and thread
Again, since we are working with knits, you’ll want to use a stretch stitch setting on your sewing machine, if your machine has one. The fabric has to stretch a lot to put on the doll, so you have to make sure the seams have some give, or the thread WILL break. If you don’t have a stretch stitch (or serger), you can use a zigzag stitch. It might not look as professional, be remember, these are doll’s underwear. Another option is to use a double needle. The idea is to use a lot of thread so when you stretch the fabric the tension is spread out over more thread and have more give and take. When you use a double needle, you get the zigzagging of the bobbin thread on the backside of the stitching, which helps.
Next, use the right kind of needle. Use a fine, ballpoint needle if you have one. Ballpoint needles should always be used for sewing knits if possible, because they won’t tear the fine threads of the knit. If you just have a universal needle that came with the machine and don’t know what I’m talking about, you should read Sew Mama Sew’s post about the different types of needles and their uses.
Finally, consider your choice of thread. You could use a wooly nylon thread in the bobbin, which is what I used. Or, I’ve also read rave reviews about Maxi-Lock Stretch Thread
, which has lots of stretch in it and is supposedly easier to work with than wooly nylon. I haven’t had a chance to try it yet, but I plan to. Even though these stretch threads are designed for use with a serger (hence the huge spool), you can use them in the bobbin of a regular machine. I hear that you can use the Maxi-Lock Stretch Thread
in the top needle too. I’ve tried using wooly nylon thread
in the needle, but because of its fuzzy nature, it gets caught up and jams.
UPDATE: Sep-01-2017: There is a new product that would be perfect for this project! It’s called Eloflex by Coats. It’s a lightweight, stretchable thread, perfect for sewing knits. You use it in the bobbin and the top thread. I heard about it from Angela Wolf (I’m a huge fan!), and she says it’s wonderful! She said just be careful winding the bobbin – go slow and don’t stretch it. But other than that, no special instructions – use a straight stitch or any stitch you choose! It is supposed to be available at Joann’s, but it is so new it isn’t in all stores yet and it isn’t even available online there as of the time of this update. But I was able to find some of the colors on Amazon. Here’s a link to an Amazon search for Eloflex (so as more vendors/colors are added, they’ll be included automatically). You can read more about the product in this Make It Coats blog post. I can’t wait to get my hands on this product!
Doing things out of order
If you’ve sewn human-sized clothes, you’ll notice that when sewing doll clothes, things are often done in a different order. With doll clothes, you have to think about the size of the opening you have to work with. Even using the free arm on your sewing machine, you can’t fit the opening around the machine. And even if you know the technique of “sewing inside the teacup,” it often is still too small to manage. So, for example, if you were making these undies for yourself, you’d usually sew the side seams and then add the waistband. But here we do the front and back waistbands separately and then stitch up the sides. It’s so much easier. Trust me.
Instructions
Ok, let’s get sewing already! Geesh! You’ll see I added lots of optional things on the pattern. I think most of it is pretty self-explanatory where to cut depending on how you are finishing the waist and leg openings. One thing that might be a little confusing is the crotch, so before you cut, review Step 1 below.
You’ll also need to cut 2 pieces of elastic trim, each about 4.5″ long, for the leg openings. And if you are adding elastic at the waist, you need to cut 2 pieces, each about 5″ long.
Step 1: sew the crotch
As I mentioned above, one thing that is a little confusing maybe is at the crotch. I made the pattern as a single pattern piece. If you have a plain fabric (or small overall print) and aren’t reusing a finished waistband, you can cut just one piece and not have a seam at the crotch (skip to Step 2). But if you have a directional pattern on your fabric or are reusing a finished waistband, you’ll need to cut two separate pieces. You can’t just cut the pattern into two, though, because you need to add seam allowances to the two pieces where you have to stitch them together.
If you have cut two pieces, the first step is to sew them back together at the crotch. It’s straight and short, so it’s a good way to start! If things don’t come out lined up perfectly, it’s okay. The leg opening trim will cover up any imperfections here.
Step 2: finish the leg openings
The leg openings are next. If you are attaching elastic trim, you’ll want to have the right side face up and put the trim on top. This way you can monitor as you sew to make sure you are on the trim. Plus you need to stretch the elastic slightly as you sew (the pieces we cut are smaller than the actual openings). It is easiest to line up the edge of the trim to the edge of the fabric and then after sewing, carefully trim away the excess fabric.
Step 3: finish the waist
If you have a finished waist already, you can skip this step (woohoo!). If you are adding elastic trim, do the exact same thing on the waistline that you did for the leg openings.
If you don’t want to use visible elastic, then you have a few more steps. I’d recommend using 1/4″ or 1/2″ elastic. I think 1/8″ is too small. And 3/4″ might be a bit too large. You could use it in a pinch, but you’ll need to add a little more seam allowance at the waist. There are two ways you could add this elastic. The traditional way is to sewing a casing, and then slide the elastic inside. If you’ve done this before and are comfortable with it, by all means, go ahead and do this. A good tutorial with lots of pictures can be found at How To Sew.
I have another way that might be easier. With fabric right side up, line up edge of elastic with edge of fabric. Stitch as close as you can to the edge, stretching the elastic slightly as you go (since it is a little shorter than the fabric). Now we are going to do lots of folding and flipping. If you like origami, you’ll love this part. First, flip up the elastic, which will turn the seam you just sewed to the back side. Second, turn over to the wrong side and flip the elastic down, so now the sewn edge is at the top (but hidden). Third, fold over the elastic again, so now the elastic is completely covered and no seam is visible. Finally, flip over to the right side, and stitch the waistband down. The width of the seam depends on the width of the elastic, but you’ll want to make sure you are stitching through all the layers near the bottom of the elastic. Again, you might need to stretch slightly as you sew. Do this for both the front and back. [I’ll add some pictures soon for you visual types.]
Step 4: sew the side seams
The last step is to stitch the side seams. This is a great place to use a serger, if you have one. If not, don’t worry about the raw edges of fabric inside, because the knit fabric won’t unravel.
Now you are done! Admire your work!
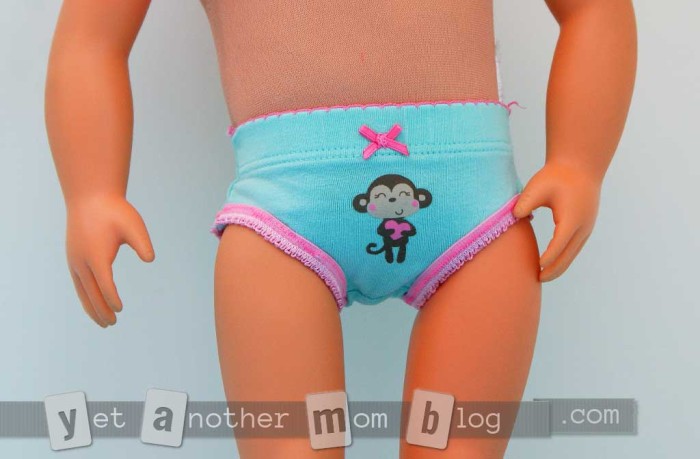
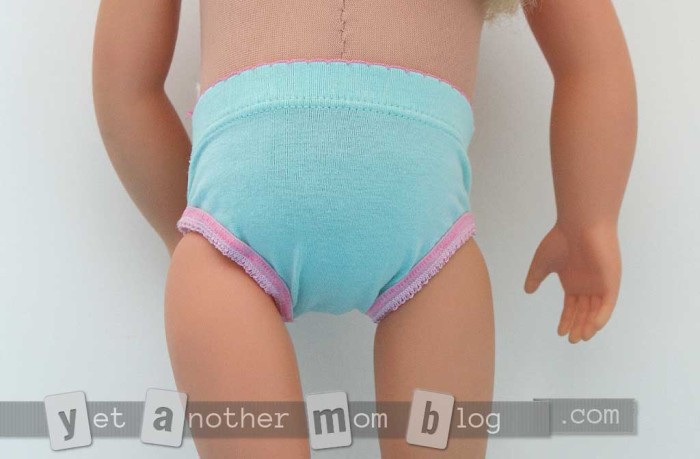
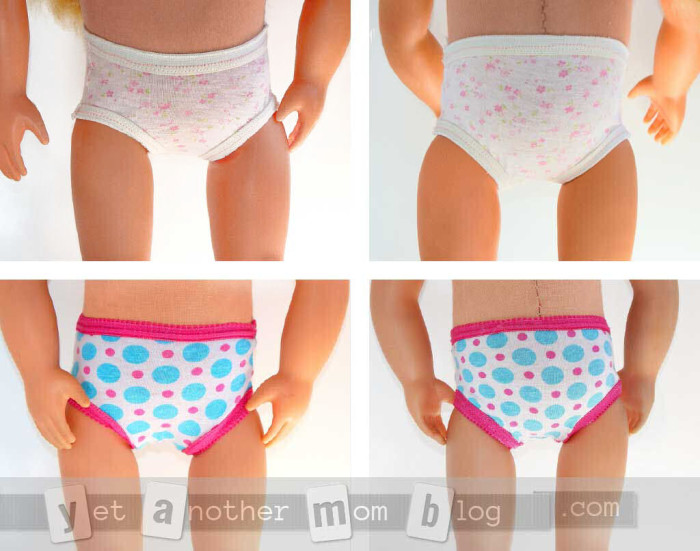
In the photo above, you can see that there is a little too much fabric between the legs, causing bunching. I adjusted the pattern that is included here to reduce the crotch width and it works much better. The top pair in the picture below fits much better! This one I didn’t try to reuse the existing waistband, and I just cut one piece (no seam at crotch). The bottom pair below I did save the existing waist.
What do you think? Will you try this or have you made some yourself before? Any tips to share?



Very cute idea using outgrown favorite pantie, looks like a great pattern
Thank you for a great blog and pattern. I will be making these cute panties for my dolls.
Thank you for this pattern and instructions on these super cute doll panties. I can’t wait to make some for my dolls.
I really like this pattern, and I hope that I can use it as a guide for making pants for my ‘Build’a’bear’.
Thank you so much for sharing this pattern. These were my first pair of doll panties and they turned out great.
I’m glad it was useful!
I can’t seem to find the right place to print off the undies pattern. I downloaded but nothing came up to print pattern. PLease advise. Thanks.
In the article in the paragraph just above the picture of the pattern, there is a link to download the PDF. Depending on which OS/browser/setup you have, it will either load the PDF in a browser window or download the file to your computer/device. You will need a PDF reader like Adobe Reader to view and print the file. If you view it in your browser, there is usually a little toolbar either at the top or bottom of the document window which doesn’t always stay visible, so you might have to move the mouse around to get it to pop up (try moving the mouse near the bottom center and see if it pops up). This toolbar has a Print button (printer icon). Hope this helps! If you are still having trouble, then I’d need a bit more information to help you further (i.e., what OS, browser version, etc. you have). Good luck!
Genius idea!!!
My Daughter and I have 18in and 23in (my Twinn) dolls and we made panties for both sizes today. To make them for the 23in doll we used our printer to increase the size of your pattern to 125%. The panties fit both size dolls very well. We will be making more.
That’s a great idea to scale up with the printer! Glad it worked out. My daughter got a REAL AG doll for Christmas from her grandmother and she wants to make some just for her. She has some undies that are too small and we somehow got the same print in the larger size when we bought more so now she wants matching ones!
.thankuou so much for the great tutorial! I made a pair today for my grandaghters A
G Doll.Fit was perfect!
Thanks! Very comprehensive and clear directions. Great suggestions and recommendations.
Thank you! I hope to have some more patterns soon!
Pingback:SEW CUTE DOLLY UNDIES | Faking It Mostly
Love the pattern, thank you! Look forward to more fun patterns.
Thanks so much for this free underwear pattern. I bought Sasha dolls for my daughter this Christmas and they’re both naked. So appreciative of what you’ve done. I’ll get right on it. And genius about the underwear trim. Have any ideas for making undershirts?
You are very welcome! I hope you make some nice ones for your daughter’s doll! As for the undershirt… I’ve been thinking about coming up with a pattern for that, and for a bra/bikini top – more like a sports bra, that can also be made from the underwear. Stay tuned!
I think you did a great job have made one pair from adult underware and was able to cut so only had one side seam was bit tricky will be ready to try your next
Thank You for putting this pattern up. I just made a pair and it was easier than I thought it would be because of your written instructions.
Thank you! Glad it worked out for you!
What size child’s underwear did you make them from?
Hi Dawn – Great question! I’m not sure, but I’m assuming girls 4-5. My daughter had outgrown them and this was over a year ago. I tried to see if I could still read the size, but couldn’t. If you have a smaller pair, print out the template and see if it would still work. I’m thinking it probably would. Let me know!
Thank You for the tutorial and pattern on the doll undies. However, did you know that when you go to print out the pattern that the counter is preset for “6”copies instead of “1” ? Just thought I would share that with you.
Thank you for pointing this out, Marsha. I did some investigating, and I’m not sure what is going on. I had the same thing happen to me when using the Chrome browser, but it did NOT happen with Internet Explorer or Firefox! And when you are on the Print dialog in Chrome (for the PDF viewer in the browser), in tiny print at the bottom there is a link to “Print using system dialog…” and if you click this, the system dialog defaults correctly to 1 copy. And when I downloaded the PDF and opened in Adobe Reader to print, it defaulted to 1. So I don’t know what is up with Chrome or how to fix it!
What size doll are these meant for? I need a pattern for Wellie Wishers but when I printed the pattern,it looked too big. Wellies have only a 6″ waist and these look bigger than that.
This pattern was created for the original American Girl doll that is 18″ tall. Wellie Wishers are a newer, smaller doll (they didn’t exist when I wrote this article).
From what I’ve seen from others, it is possible to adjust the original patterns to fit the newer smaller dolls. For this pattern, print the pattern at 65%. If you do this and just cut it out as printed, you will get hipster cut. Or you can increase the height of the waist about a half inch to have a higher waist.
I don’t have one of these dolls and haven’t tried it, so you might want to do a test cut on an old junky pair to do a test first.
If you try it, let me know how it works out or if you needed any other adjustments!
I was wondering I just printed this pattern and I was wondering if you can use cotton fabrics? Also I love this pattern and can’t wait to use it! Great idea!!
If you mean a cotton woven fabric (like quilting fabric), I don’t think it would work without altering the pattern. It really relies on a bit of stretch. If you have some scrap fabric to play with, try altering the pattern by making it a little wider (add maybe 1/4″ to the side seams?). You’ll have to do the casing at the waist to insert the elastic. I’m not sure about the leg openings. If you just hem them, they may look funny. So you might have to add extra on the pattern to make a casing to add elastic there too. If you try it, let me know how it works out!
Thank you so much for this pattern. I tried a lot off diaper patterns formy GD baby Born but this pattern’s fit is spot on! I made 3 already.
Thank you so much for this cute pattern. I also printed it out in 65% to try for the Wellie Wisher doll.If you plan on making anymore doll patterns, I look forward to trying them.This is such a lovely gift.